Adapter change
Proceed as follows to change the VCI adapter:
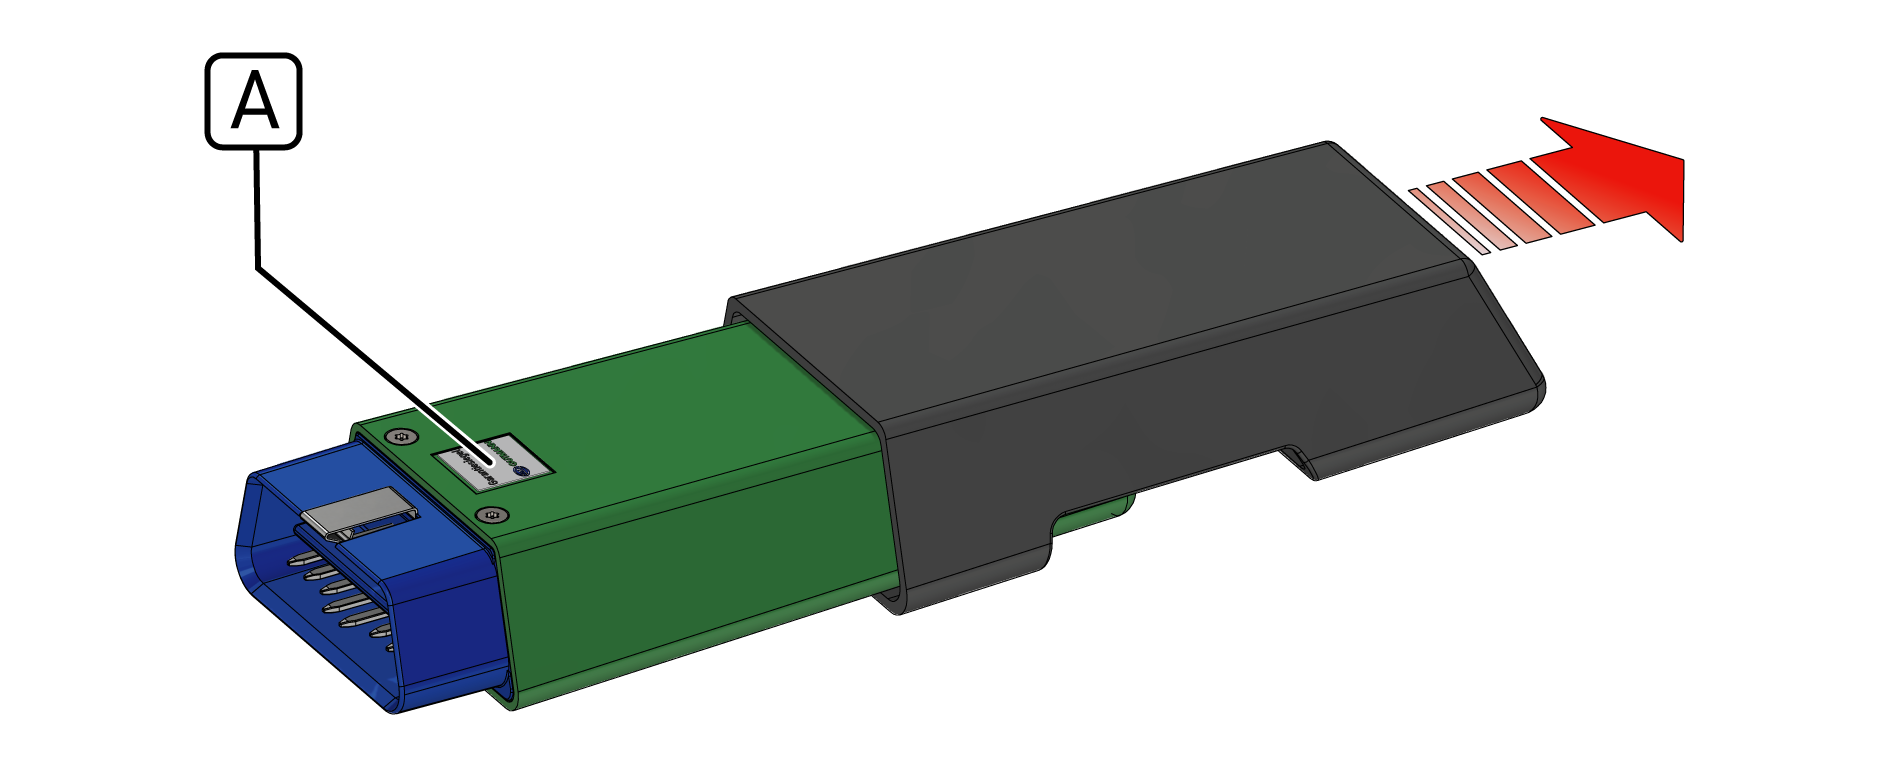
- Carefully remove the black housing to the back.
NOTICE

Warranty
The warranty seal (see ill. A) must not be removed and must not be damaged.
Warranty becomes void if the seal is damaged or even missing.
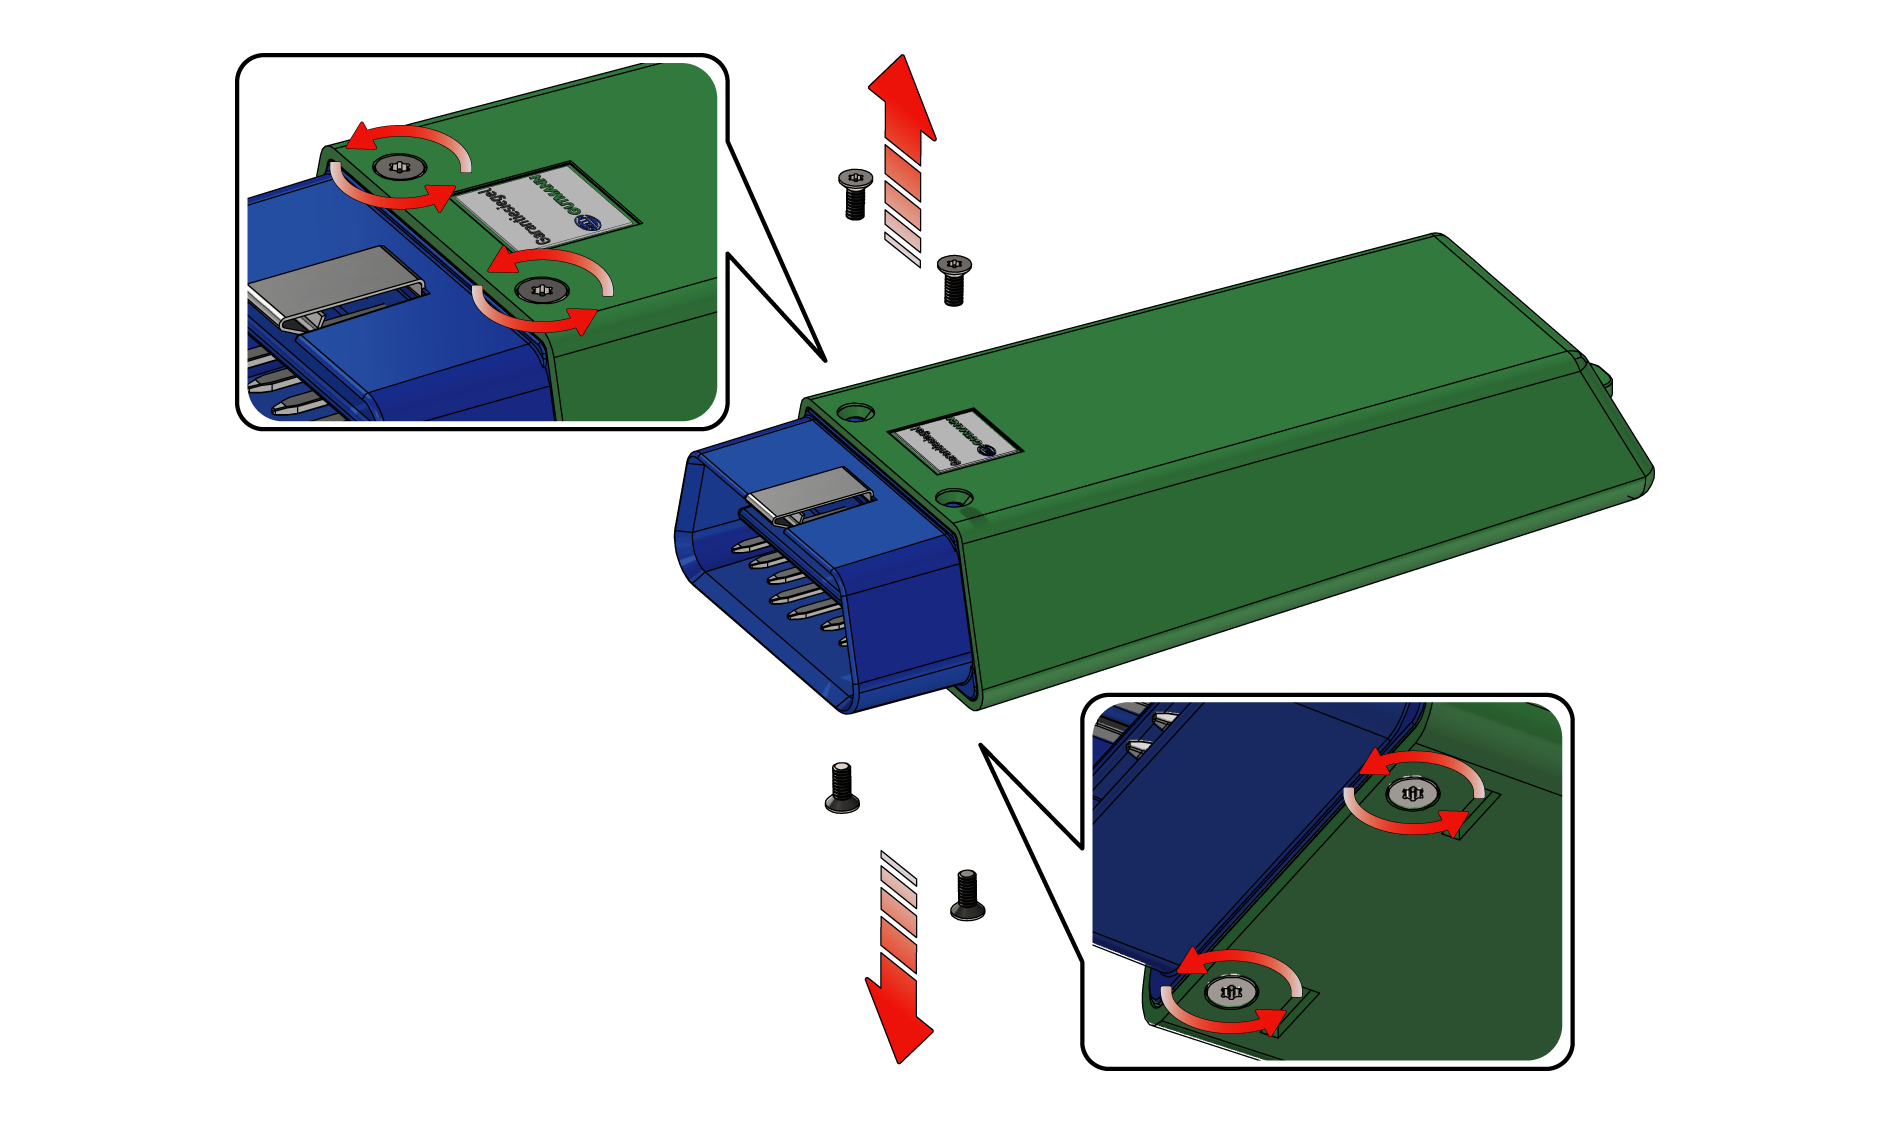
- Screw out both screws at the top and both screws at the bottom of the VCI.
CAUTION

Possible defect of the VCI
Do not use the screwdriver as lever.
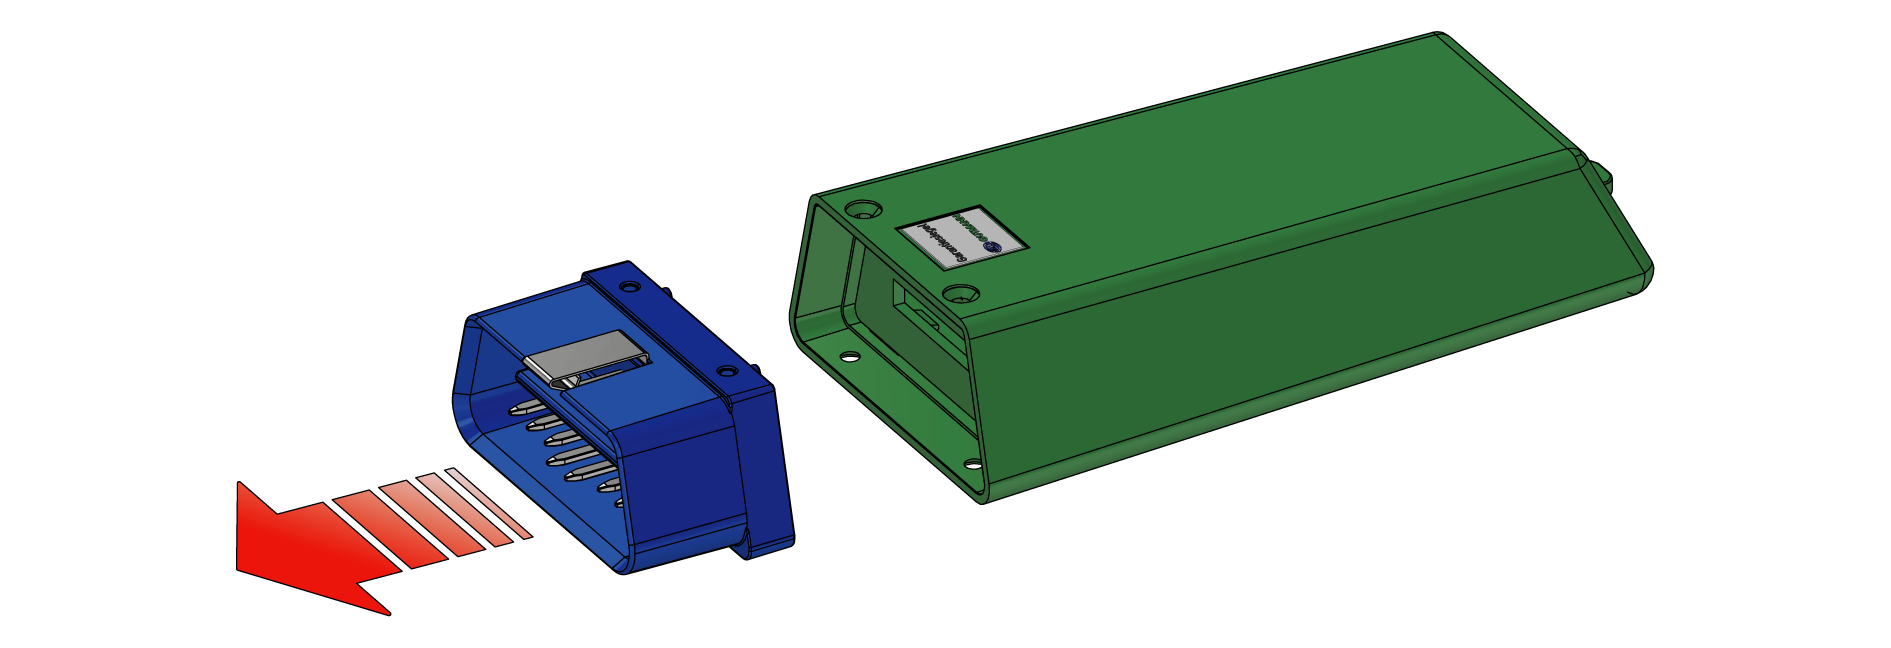
Pull out the connecting piece only with your fingers.
- Pull it carefully towards the front.
CAUTION
Possible defect of the VCI
Incorrectly installed components can damage the pins.
Pay attention to the correct alignment of the parts when assembling them.
- Gently fit the new adapter from the repair kit and press it on equally.
- Carefully screw in the new screws on both sides equally.
- Fit the black housing again.
- Your VCI is ready for operation now.